Thursday, March 10, 2011

Wipeable and Reversible Placemat Tutorial

I have been trying to figure this out for a while now.  I want my table to be dressed nicer, but with a toddler around, it is just not practical to have linens on the table.  I thought maybe to use oilcloth, but it tends to split fairly easily, so turning would be a problem.  Then I thought I could avoid turning by using bias tape, but then the bias tape would get dirty.  Them I came across a blog post (which I lost the link, ugghhhh!) that used dollar store foam placemats and covered them with fabric and iron-on vinyl.  I was so excited - I had never heard of iron-on vinyl before.

So, I decided to skip the foam placemat and just make mine with fabric. 


I am really happy with the result.

Here is what you'll need to make 4 of these:
  • one yard of home decor weight fabric
  • one yard of complimentary fabric, preferably home decor weight, but not necessary
  • 3 packages of iron-on vinyl (2 yds x 17" per pack) - creative couponing at Jo-Ann's worked well for me here.
  • Corresponding thread
  • Iron
Start by cutting out your fabric pieces.  Each piece should be 19.5" x 14".  be sure to pay attention to which way you want the print to go on your placemat.


Next, cut out your vinyl pieces.

Yes, I am aware this is upside down, but I'm running out of time :)
Now is your chance to iron out your fabric perfectly smooth.  Hold the steam though...you don't want your fabric wet.


Peel off the vinyl piece from the backing.


Place it on top of the RIGHT side of your fabric.


Smooth out.

Now place the paper piece on top of the vinyl.


With your iron on medium heat and no steam, begin pressing...follow package instructions to be sure you get a good bond.


Now flip your fabric piece over and press again.


Turn it back over and peel off the paper.  Voila.  Repeat with the other 7 fabric pieces.


Now place your two different fabrics with right sides facing each other.  Do not pin as you'll puncture the vinyl.  Carefully sew around the edges leaving a large hole for turning - this is much more difficult to turn than regular fabric...leaving a large opening will help cut down on wrinkling.


Note how I sewed "into" the piece before I started sewing around the edges.  This helps keep everything more stable when you are turning. 

Cut all four corners on the diagonal.


Turn the placemat inside out.  it will be a wrinkly mess:.  Don't worry.


Go back to the ironing board.  Fold under the opening and hold it steady.  meanwhile, place the paper that you used for pressing back on top and iron the opening.  Warning:  The two sides will fuse together...so you only get one shot here.  Now continue to press the whole placemat, both sides.  I found that using high heat here was very helpful.


Much better, right?


 Now top stitch all around.  Tip:  Use a dark colored thread, otherwise with frequent wiping, light colors will become very dingy.

So, there you are...a super easy and fun way to update your kitchen table.  I love how I can mix and match them to suit my mood/decor.

I hope you enjoy these as much as I do!

Sunday, March 6, 2011

Meal Plan 3/6 - 3/12

Sorry for not posting last week...it was an uninspired week in the culinary sense.  Life has just been go, go, go lately.  Okay, enough excuses already.  This week will be a different story (somewhat).  But, before I get to that...

I think Spring is officially on its way (crossing my fingers and toes).  Even though it snowed this morning, I was able to capture these photos just minutes ago.


It just made me smile to see these little Robins.  Aaah.

On to food...

Meal #1:  Curried Vegetable Samosas with Cilantro-Mint Chutney and Mangoes
Meal #2:  Peanut Chicken in the Slow Cooker with Rice and Steamed Broccoli
Meal #3:  Asparagus Soup and Pesto, Mozzarella, and Goat Cheese Paninis (Little Bean is OBSESSED with goat cheese!)
Meal #4:  Fajitas with Chicken, Beans, Peppers, and Onions with Guacamole
Meal #5:  Minestrone Soup in the Slow Cooker (I was planning on making Eggplant Marinara and Penne...but I couldn't find an eggplant at the store today???)
Meal #6:  Apple, Cucumber, Goat Cheese Salad with Mint Vinaigrette and Crusty Bread

So, as many of you know, I buy organic chicken...usually I try to stick to one meal per week with meat to cut down on the astronomical cost.  Well, this week I went nuts and spent $30 on chicken!!!!  Shhhh...don't tell Daddy Bean.  Next week will be a beans and rice week for sure!

Have a wonderful week!

Friday, February 25, 2011

Snowy (or Rainy) Day Kid Project - Cookie Pops

Let me start by saying I take zero credit for any of these ideas.  I didn't even find this myself.  So, thank you to my friend Nicole who posted this link on Facebook which gave Little Bean and I a big project for the day.  And might I mention that we had a hideous blizzard two days ago which left is with 12 point something inches of snow...and now we have FRIGID temperatures...like -16 last night (yes, that is a minus sign!).  So, needless to say, we are  little stir crazy and this was the perfect project to fill a good part of the morning.

So, with out further ado...here it is..."play dough" cookie pops!


Aren't these so much fun?!  I don't know if I will ever make sugar cookies the regular way again!  Little Bean was REALLY into it too.  She had so much fun picking the colors (pink and purple, of course...and yellow) and of course playing with the dough.


Say "Cheese!"

This is the brainchild of Amanda's Cookin' (link here).  I can already think of a million different ways/occasions to make these.

Have I inspired you?  I hope so!


Monday, February 21, 2011

Meal Plan 2/20-2/26

I had an amazing weekend.  I headed home to stay with Mom with Little Bean in tow.  Had a lovely visit with mom and got to go to my fave Thai restaurant.  Then I got to have a girl day on Saturday with my Jill - antique shopping, lunch, and wine.  We were even joined by our elusive friend Jerusha.  Then Sunday my nephew and brother-in-law came over to play and Little Bean had so much fun with her cousin.  Then we were off to Jill's house where Jill's boys took a turn at wearing out Bean...and we were so blessed with a 50-something degree day - sunny too!  We even arrived home to Daddy bean cooking dinner.  It was an amazing weekend.

But, back to reality.  Here's what we are eating this week:

Meal #1:  Vegetarian Chili with Corn Bread
Meal #2:  Pahd Thai with Cucumber Salad (cookbook link here)
Meal #3:  Veggie Scramble with Potatoes (otherwise known as Brinner)
Meal #4:  Black Bean Enchiladas (inspires by a reader...hope mine are as good as hers!) (Sauce recipe here)
Meal #5:  Chicken and Smoked Gouda Paninis with Apple-Spinach Salad

Here's to a great week!

Sunday, February 13, 2011

Meal Plan for 2/13 - 2/19 and Sweet Potato Souffle Recipe

It's Valentine's Day tomorrow...and in years past I have been a total cynic calling it a "Hallmark Holiday" and never celebrating it with my husband.  But now that we have Little Bean on board, I feel compelled to celebrate every holiday possible and show her all of the little joys that I remember as a child.  So, we handmade our Valentine's last week, went to a kiddo V-Day party and sent off Valentine's to all of the family members.  She loved this part, so she'll probably really love the treats and presents I have in store for tomorrow. (FYI:  Still haven't figured anything out for her Daddy besides one of his favorite meals...any ideas???)

So, here is the plan for the week:

Meal #1:  Cashew Chicken and Green Beans

Meal #2 (Valentine's Day):  Jerk Chicken and Corn Fritter Casserole (I use chicken breasts instead of a whole chicken)

Dessert (still undecided):  Oreo Dirt (for Little Bean) or Peanut, Caramel, and Chocolate Tart (for Daddy Bean)

Meal #3:  Black Bean Burgers with Mango Salsa and Sweet Potato Fries

Meal #4:  Red Lentil Soup with Grilled Cheese (sorry, link no longer exists)

Meal #5:  Eggplant Parmigiana with Tossed Salad

And a few weeks ago I posted that I was making Sweet Potato Souffle on my menu plan and the recipe was requested.  So here you go Audrey:


My mother has been making this at the holidays for years.  It has been adapted, but I don't know the original source.

Sweet Potato Souffle

For the Souffle:
4 large yams (yes yams, not sweet potatoes...despite the name)
1 tsp. vanilla
1 tsp. cinnamon
1 c. milk
2 eggs (I think traditionally you are supposed to separate the eggs and whip up the whites to stiff peaks and fold it in to the rest of the batter, but I don't bother and it's great)
1/2 c. brown sugar
1/2 stick butter (softened)

For the topping:
1/2 c. brown sugar
1/4 c. flour
1/2 stick butter (chilled and cut into pieces)
1 c. pecans
zest of one orange
Note:  If you are using a deeper casserole dish with a smaller surface area (such as the one pictured above), you will want to cut the topping in half - otherwise it is too much.

  • Peel and cook potatoes until very tender.  Add them to a stand mixer.  Using the whip attachment, whip potatoes until smooth.  Add remaining ingredients and whip until well incorporated.  Place in desired dish.
  • For the topping, I recommend using your hands, but you can also use a pastry cutter to work the butter into the dry ingredients.  You should mix until there are a few small pieces of butter left but it is mostly incorporated.  It will be very crumbly.  Sprinkle on top of the yam mixture.
  • Bake at 350 degrees for 30 minutes or until bubbly.

Wednesday, February 9, 2011

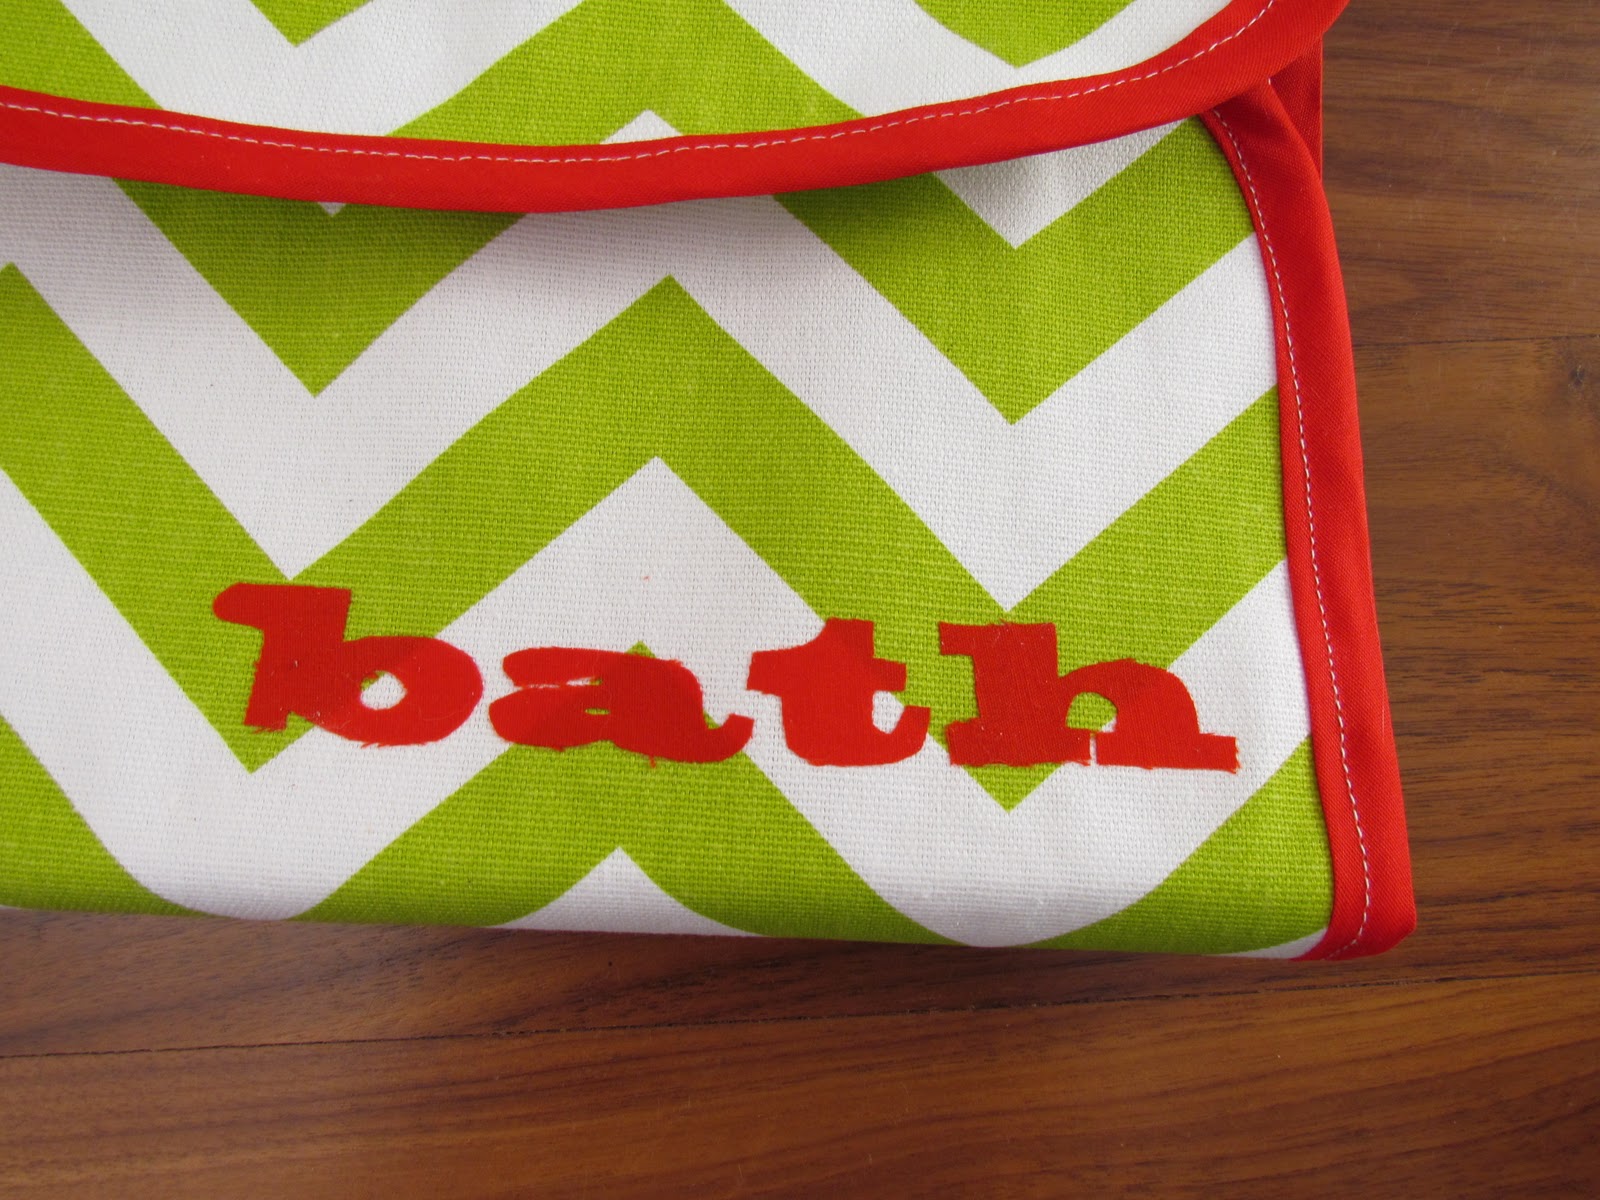
Carry-on Toiletry Bag and Tutorial

Isn't flying such a gorgeous experience these days.  You have to take off your shoes in public unsanitary places, potentially get strip searched, pay to check bags...what's next?  Well, here is something that can maybe, just maybe make carrying on a little easier.  I was literally just using freezer bags for all of my stuff (well, they end up needing to be there anyways).  So, I wanted something that was just slightly more stylish than freezer bags.


Labeled, just in case I forget ;)

I made it so that it would hold my little 3 oz or less containers...this is not intended to hold full size toiletries.  But it holds everything that I need for a short trip.


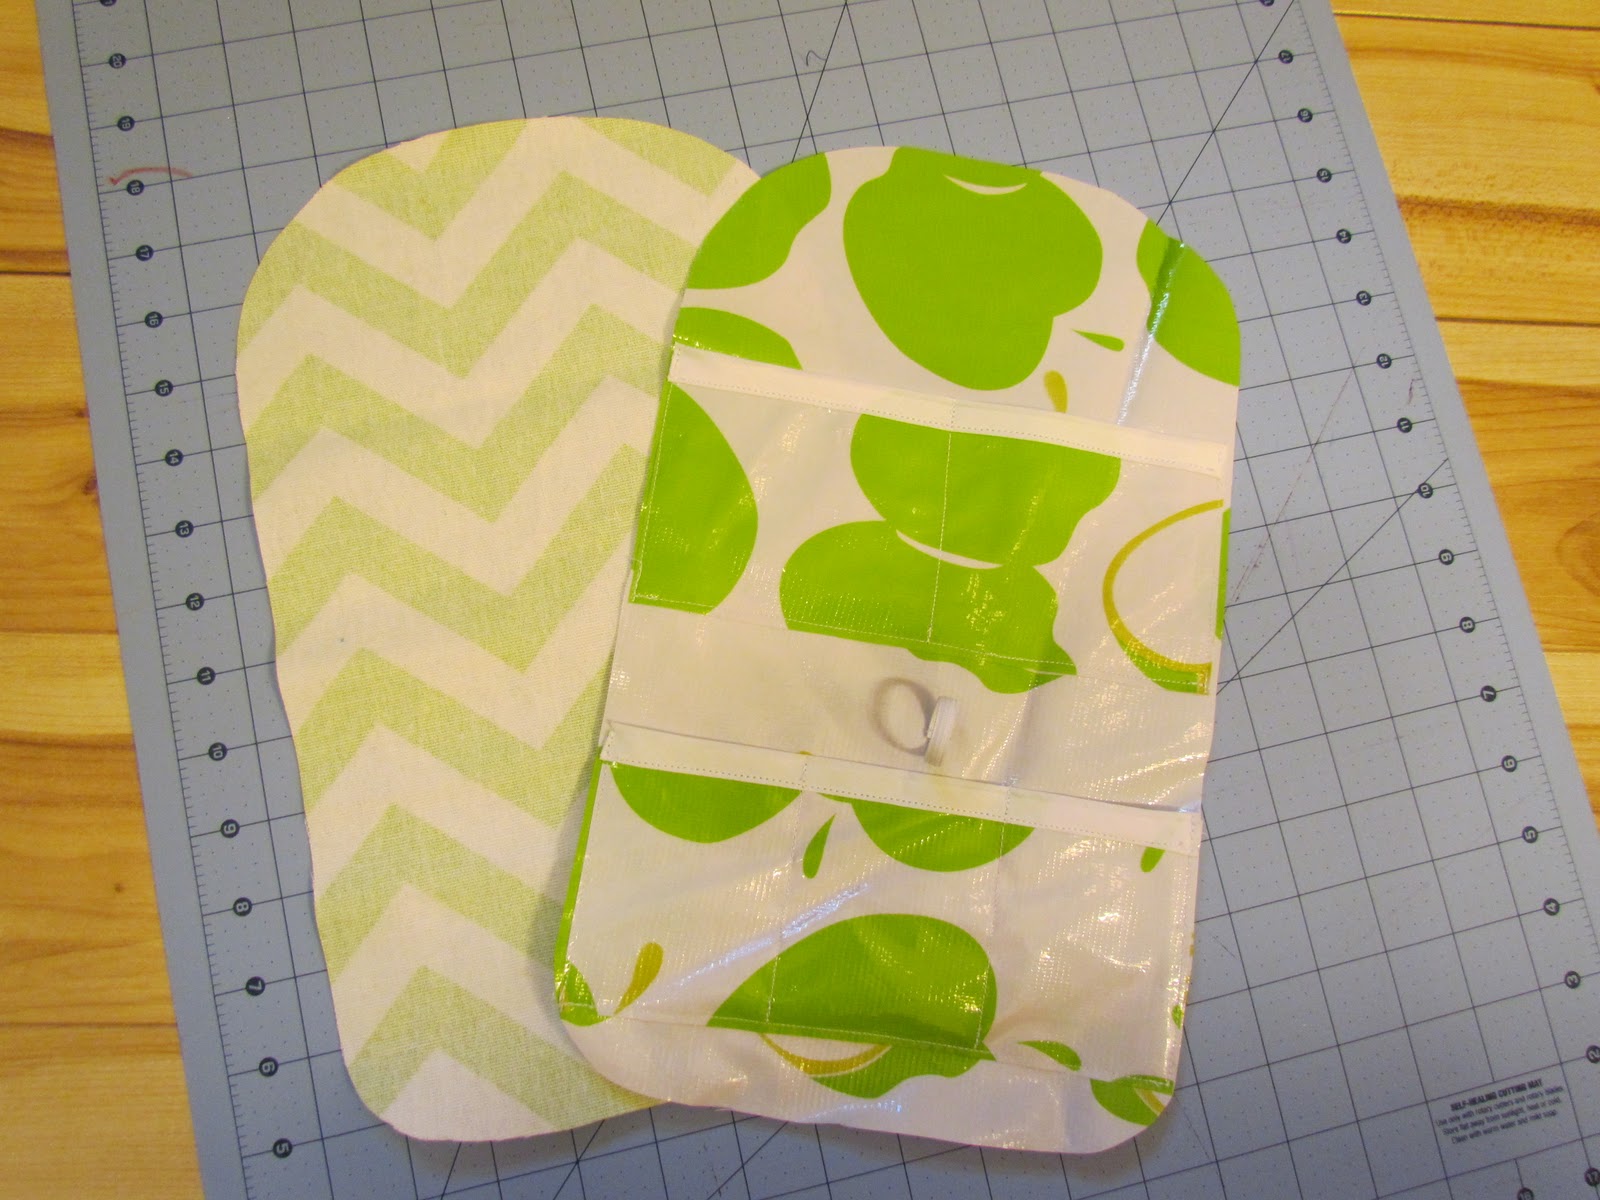
I'll get to the how to in a second.  The pictures in the how-to are from the prototype (pictured on the left) which ended up being just a little bit off size wise.  So, bear with me.


Supplies needed for this project:
  • 1/8 yard oil cloth
  • 1/8 yard coordinating home decor weight fabric
  • ~4 yards bias tape
  • metal snap or sew in velcro
  • thread
  • ~3 inches of elastic (I used 1/4" width)
  • pins
I used oilcloth so that this would be easy to wipe down.  you certainly don't have to, but if you use a cotton, I would be sure to use home decor weight for both sides or sew in some canvas to make it heavy enough.


Start out by cutting two rectangles 16 1/2" x 10 1/4"
Fold each piece in half vertically and then cut the corners to round them off so they look like this:


 Then cut two 10 1/4" x 3 1/2" strip out of your inner fabric.


Sew the bias tape to the top of each of your strips by first sewing the inside of the longer side onto the back of the piece (see picture).


Then flip the bias tape over and sew the front side being sure that you "catch" the back as you sew.

front side


back side
 Decide exactly where you would like to place your "pockets" and pin them to the inner piece.


Now sew around all three sides of the pockets.  On the sides you want to stay quite close to the edge so that your stitching is covered by the bias tape at the end.


Optional:  I sewed on the pockets so that each one would be divided.  I made two pockets on the top and three on the bottom.  Just measure them out before you sew so they are even (skip down a couple of pics to see).

Cut your elastic to be about 3" (Note:  I wanted my toothbrush case to fit in here...but if you just want to fit a toothbrush by itself this loop will need to be much smaller.


Form it into a loop and sew one end down just beneath your top row of pockets. 


Loop it over and sew down the other end.  Secure it well.

Note:  If you are sewing on velcro, then you will want to do it now.  Figure out exactly how you want the bag to close and mark the places with a disappearing ink pen.  Sew on the velcro.


Oh I almost forgot...for those applique letters...follow the tutorial here over at Make It Love It.  You'll want to do that now too!

Now we are going to finish it off.  With the wrong sides facing each other, stack up your front and back pieces.  Pin in several places.


 Starting at the bottom, sew your bias tape on (as you did above).  Flip it over and stitch down.


Measure out where you would like your clasp or your elastic to be on the bag.  Mark it with a disappearing ink pen.  I used a metal clasp on this one, but used velcro on the other.  If you sew on velcro, you will have already done so.  I decided to go through all layers so that the clasp would be sturdier...oilcloth has a nasty habit of tearing.


Insert clasp according to package directions.  Be sure that you are putting it in correctly...and not backwards like I did the first time...those suckers are hard to get out!


how the clasp should look

here's the velcro version...ignore messy sewing machine thread jam
I hope that somebody can find this useful for their travels and overnight stays.

Thursday, February 3, 2011

My Friend, the Photographer

There are certain gifts that you receive in life that stand out among the others.  Mostly, they are the ones that were not expensive or trendy.  But instead the ones made and given by the ones you love.  I received one of those gifts today.  It is not the first gift of this magnitude that I have received from this friend either...which reminds me how truly blessed I am to have her in my life.

My dear friend Jill, the photographer, sent me a belated Christmas gift today which included three framed floral prints...which I have not decided exactly where to put them yet...will post a photo when they are up...as well as a disk of photos from the photo shoot she did of Little Bean during her last visit in November.  The photos are so beautiful and they are already some of my most cherished.  Jill has been so generous taking pictures of our family for years - from Christmas cards to Baby to Toddler.

I wanted to share some of them here.  Let me just say that it is so hard to narrow them down...I love them all.


 And she found a few back from when Little Bean was just 9 months old...


There is something about her photos that makes her look almost angelic.  I hope that you have enjoyed these.  Leave a comment and let Jill know what you think.

Jill, thank you not only for these pictures, but for being a force in my life for so many years.  I truly don't know what I would do without you.